
Not-So-Rough Openings
Framing exterior openings precisely will make installing the windows and doors a breeze.
Synopsis: Windows and doors are inserted into the areas of a framed wall known as rough openings. Framing the rough openings isn’t a matter of throwing a bunch of studs together with a nail gun, though. Rough openings need to be framed properly so windows and doors can be shimmed level and plumb. Seasoned builders John and Kerri Spier show us the correct way of framing rough openings from layout through assembly. Their approach involves simple steps and framing basics to achieve accurate, well-built rough openings for any job.
Although the name suggests otherwise, rough openings demand plenty of precision, especially when they are framed in load-bearing walls. Properly done, rough openings provide a place for windows and doors to fit securely, unaffected by the critical structural work being done by headers, king studs, trimmers, sills, and cripples (or sill jacks). After years of building, I’ve learned that getting rough openings right makes the rest of the job go smoothly.
Check the plans first
Although the rough openings for doors and windows are specified on the plans, these dimensions are worth double-checking. It’s important to note that sizes always are described width first, then height. I like to look up rough-opening dimensions in the tables provided by window and door manufacturers. These tables are excellent, and I’ve learned not to second-guess them. Getting this information correct is the first step in avoiding serious frustration a few weeks down the line.
Occasionally, circumstances can require rough openings to be modified. Non-standard floor thicknesses, specialized flashing elements, and applied sills are just a few details that can affect rough openings and should be thought through. If the building details are particularly unusual or complicated, it’s smart to test the scenario as a mock-up before committing to a whole project.
Verify rough-opening locations
In conventional platform framing, headers typically are sized so that the opening is at the correct height with the header tight to the top plate. Sometimes this placement needs to be modified, either by using cripples above the header or by moving the header up into the plates.
Lateral locations of rough openings usually are specified from the edges of the building to the centers of the openings, and between centers when several rough openings appear next to each other.
Before transferring layout marks to the lumber, I give the entire plan a final check. Confirm clearances, and make sure that the rough-opening layout will maintain symmetry within and between floors, if that’s a priority. When there is room to move left or right, it’s nice to make sure that trim details fit cleanly without ripping and squeezing.
Gather all the pieces
All the wall components that define a rough opening need to do their part in making the opening solid and square forever. The king studs on each side of the header should be straight in all directions (for example, no bow, crown, or twist). The header needs to be sized appropriately and should provide room for insulation, if possible.
Trimmers need to be continuous from the header to the bottom plate. In some areas of the country, this detail is required by code. Even if it isn’t required, I still maintain that this practice is the best. Interrupting the trimmers with sills is not a good idea because the ends of the sills eventually can crush under the load. Multiple gaps, even of the slightest dimensions, can allow settling to occur. Lateral resistance of the wall is better with continuous trimmers as well.
The building code doesn’t specify the numbers of trimmers, but convention (and my building inspector) requires that we have two at each end of openings over 6 ft., three over 12 ft., and stamped engineering on anything questionable.
The sills, which sometimes are called benches, need to remain flat and straight to support pan flashings under windows, and sometimes the jambs of the windows themselves. Sill jacks support the sills and maintain the stud layout of the wall for fastening sheathing and wall finishes. Some framers use a single sill and skip the sill jacks against the trimmers when they don’t fall on layout; eliminating three pieces of wood here saves time and materials and still meets code. I prefer the extra nailing and solidity of double sills with end support.
Assemble the parts in order
While assembling the parts, it’s important to keep everything flush to the inside. I keep framing tight to the deck as I nail the pieces together, and I nail carefully so that split ends don’t create bumps. Maintaining a flush inside surface helps to minimize drywall cracking and also creates a smoother final wall finish.
The rough opening goes together in clearly defined steps, and following this process in order is important. Before I get into the main components of the rough opening, I nail the common and king studs through the top and the bottom plates starting from one end
of the wall. For the time being, I leave out any studs or partition posts that are close enough to the king studs to prevent end-
nailing the header.
Once the common and king studs are in place, I pin the bottom plate to a snapped line on the deck and square the wall. As a unit, the wall needs to be straight and square before the openings are assembled; once all the components are nailed off, any adjustment racks and bends the parts and loosens the joints.
After the wall is squared, I drop the header into the opening and nail it securely through the top plate and then through the king studs. Before I forget, I like to nail in any studs that were left out to allow for clearance of the nail gun. The trimmers are installed next, using enough nails to keep them from twisting.
If I’m framing a window opening, the next step is to nail in the sill jacks. Put the end ones in first so that they can be nailed securely to the trimmers. To get an accurate layout for the first sill, I lay it along the bottom plate, transfer the layout marks, and nail in the sill. To give drywallers and trim carpenters a little help, I keep nails in the second sill in line with the sill jacks.
Complete the final step
Sheathing and housewrap come next, and I usually install these materials with the framing flat on the subfloor or slab. After this, there’s one final step in finishing off the rough openings in the wall.
With the wall tilted up and braced plumb, I drive a few more nails in the corners that I wasn’t able to reach while the framing was flat.
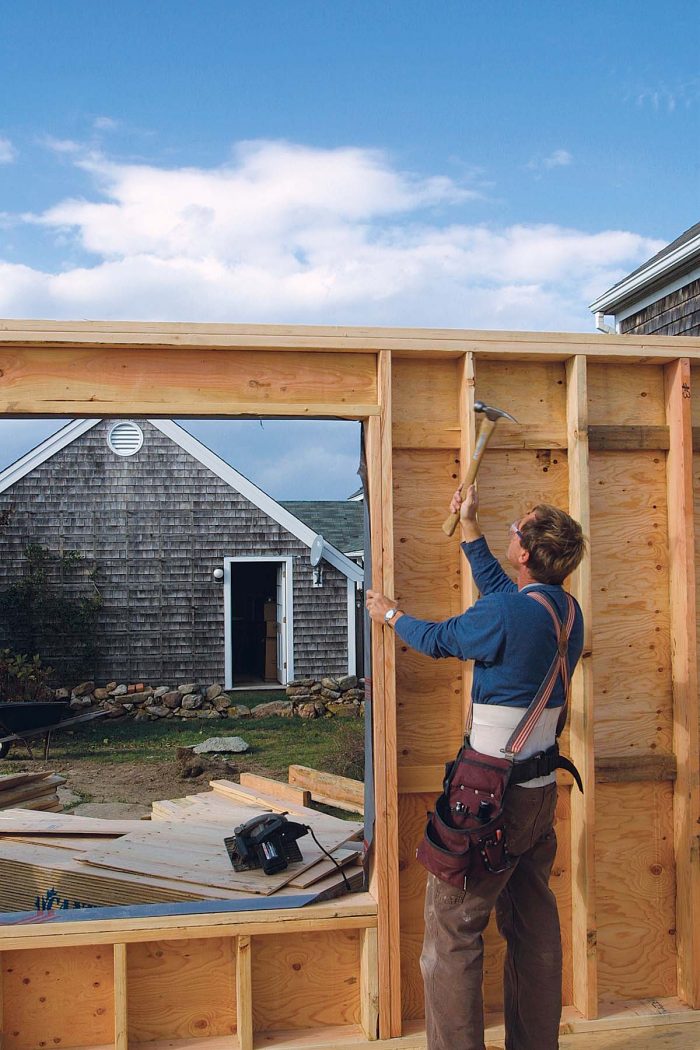
accessible while the wall was lying on the deck.
Centerlines guide the layout process
Most plans indicate door and window locations by noting a dimension to the centerline, so I start my layout by marking the centerlines on the wall plates. Then I measure half the width of the rough opening on both sides of the centerline. Using a Speed Square, I finish marking the trimmer and king-stud locations.
Square the wall, then frame the openings
I nail in the king studs and common studs first, leaving out any commons that will get in my way later when I’m nailing in the header. Then I square up the wall and tack it to the deck to keep it that way while I finish the rough openings. I install the header between the king studs next, then nail in any commons that were left out. Because doors and windows are attached to the trimmers, I nail them solidly to the king studs to minimize twisting and warping. I put two 16d nails at the top and the bottom, then one staggered every
12 in. in between. If it’s a window opening, I don’t nail between 10 in. and 20 in. off the floor. That way, plumbers and electricians are less likely to hit a nail when drilling. I also angle the nails slightly so that the points don’t come through and damage hands and wires later.
Cripples and sills complete a window
When installing the cripples and sills for a window opening, I nail the cripples into the bottom plate first. Then I
lay the sill across the cripples and transfer the layout. I nail the first sill in place, then add a second sill (entirely optional) to act as nailing for interior trim. I keep the nails in the second sill aligned with the cripples to help drywallers and trim carpenters find the framing later.
Fixing wrong rough openings
Here are a few situations when coming across wrong rough openings:
Problem: The window opening is too short.
Solution: Enlarge the opening by removing one of the two sills. If there’s only one sill, cut the tops off the sill jacks to lower it.
Problem: The header is too low.
Solution: Substituting a smaller but stronger header works, but then the trimmers need to be replaced.
Problem: The opening is too narrow.
Solution: If I need to gain 1⁄4 in. or less, I use a circular saw to shave the trimmer studs. Anything the sawblade can’t get I remove with a chisel. Substituting narrower trimmers is also a good option. After checking bearing requirements, I substitute 2x trimmers with 1x or 5/4 stock. Eliminating trimmers and substituting mechanical fasteners such as Simpson HH4 header hangers (www.strongtie.com) is an excellent fix. In the case of a window opening, replace at least the top sill with a longer one.
Problem: The opening is way too narrow.
Solution: Leave most of the framing in place, and simply move the king stud and trimmers on one side, replacing the header and sills with longer ones.
Problem: The rough opening is in the wrong location.
Solution: Rather than start from scratch, I move the rough-opening assembly as a unit. I start by cutting through the nails along both top and bottom plates. If the sheathing is on already, I cut the nails with a reciprocating saw after creating some space between it and the framing with a sledgehammer. Before moving the unit, I cut the new opening in the sheathing, then install the rough-opening assembly
Framing terms
Acquaint yourself with important terms to know when it comes to rough openings.
Rough opening: An opening deliberately oversize by 1⁄2 in. or so for windows and doors to be shimmed plumb and level.
Header: In load-bearing walls, this beam carries the load around windows and doors.
King stud: Full-length studs nailed to each side of the header to support the rough-opening assembly between plates. They are the same length as the wall’s common studs.
Trimmer stud (also called jack or jack stud): These studs are nailed to the king studs directly beneath the header and carry the load transferred by the header down to the bottom plate. Trimmers set the height of the rough opening.
Sill (also called bench or saddle): This 2×6 is laid flat and nailed between the trimmer studs to support the window. The sill serves as a foundation for the window’s pan flashing. Adding a second sill here provides extra nailing for trim, but it is optional.
Cripple(also called sill jack): These shortened studs support the sill and act as nailing for sheathing and interior-wall finishes. They follow the same layout points as common studs for the entire wall. Nailing sill jacks to trimmers when they don’t land on layout is optional.
Photos courtesy of Roe A. Osborn
RELATED STORIES
Fine Homebuilding Recommended Products
Fine Homebuilding receives a commission for items purchased through links on this site, including Amazon Associates and other affiliate advertising programs.

Guardian Fall Protection Pee Vee

Sledge Hammer

Stabila Classic Level Set
